Friday, March 27, 2015

[SOLVED] avrdude: ser_open(): can't set com-state for "\\.\COM6"

CAUSE:

once upon a time when i was noob in Arduino i tried to connect my Arduino and computer with the help of Processing and tried to change the color of the display screen with the help of potentiometer.
In this process something went wrong and the display on the screen started to flicker. Ignoring that i tried again at that time my led on Rx pin started glowing continuously and then kept quite after sometime i was able to connect the Arduino but couldn't write to it. Every time i tried to write to it,it gave the same error with  msg (avrdude: ser_open(): can't set com-state for "\\.\COM6").

Noticing that i tried to solve it in many ways:
1. Pressing reset with different time intervals
2. Connecting to different ports
3. Connecting to different computers
4. Checking connectivity

But nothing worked so i thought that i have shorted the board and have to buy one. Then i thought if my Arduino was shorted then it shouldn't be able to be connected my computer as the controller or some circuit got shorted but it was connecting so  then i got the idea how to resolve it.

SOLVED:

  1. Reset the Arduino by pressing reset button.
  2. Uninstall all the Arduino compiler files including the drivers from the device manager of your computer. PLZ note the com port of Arduino in the device manager.
  3. Connect and check whether the Arduino is shown in device manager if shown then uninstall it manually
  4. Re install the Arduino compiler and hook up Arduino to it.
  5. Re install all the Drivers
  6. At this time you will see that the com port had changed if it didnt then change it manually from device manager 
  7. Cross your fingers and write the blink code to.
  8. Now this should work properly

ANALYSIS:

what i understood is that the msg goes something like this the device cant access the files relate to Arduino(avrxxxx)which is located in the com(xxx) port and the port status cant be updated with the current new values so resolve it manually.

Note: this should work in most cases including varies other errors which prevent from writing to the Arduino board.

Friday, March 20, 2015

ARDUINO SYNTAX, INSTRUCTIONS AND CONSTANTS AT A GLANCE(UPDATE)

INSTRUCTIONS:

The instructions are case sensitive in case of compiler (Arduino 1.6.0) so use of upper case or lower case should be done properly.

 1.pinMode(pinname/pin no,direction);
this inst is used to specify the direction of the data flow
ex-1: pinMode(12,output);
This is used to declare pin no 12 as output.
ex-2: pinMode(13,input);
This is used to declare pin no 13 as input.

 2. digitalWrite(pinname/pin no,value/state); 
This instruction is used to write value to digital pins i.e (1~14 pins)
ex-1: digitalWrite(12,HIGH);
EX-2: int pinning=12
       digitalWrite(pinning,HIGH);
Both produce same output

 3. digitalRead(pinname/pin no,value/state);
This inst is used to read value from the digital pin.
ex-1: digitalRead(12);
ex-2:digitalRead(pinning);

4. analogRead(pinname/pin no,value/state);
This inst is used to read analog values from the analog pin.Its resolution is 1024 bits.
ex-1: analogRead(12);
ex-2: analogRead(pinner);

5. analogWrite(pinname/pin no,value/state);
This inst is used to write analog values to analog pin.Its resolution is 256 bits.

CONSTANTS:

1. HIGH: digital one
2. LOW: digital zero
3. INPUT: inward flow of data used at the time of pinMode.
4.OUTPUT:outward flow of data used at the time of pinMode. 

GETTING STARTED (ARDUINO UNO)

REQUIREMENTS:

  1. Arduino UNO
  2. USB cable 
  3. Download the compiler (environment) from Arduino environment and install it
STEPS TO INSTALL UNO:

  1. Connect the board to the computer using the cable. 
  2. The green power (labeled PWR) should go on.this is a indication that the board is working
  3. Next you need to install drivers.
  4. Open "DEVICE MANAGER" of your computer.
  5. Look under "OTHER DEVICES" for "UNKNOWN DEVICES".
  6. Click on "UNKNOWN DEVICES" and click update driver software.
  7. Next choose "BROWSE MY COMPUTER FOR DRIVER SOFTWARE" option.
  8. Finally navigate to and select the driver file named "arduino.inf",located in the "Drivers" folder of the Arduino Software download. If you cant find the file simple choose the "driver folder" and press OK.
  9. Now your computer will update itself.
STEPS TO SET COMPILER AND RUNNING FIRST TIME CODES:
  1. Open compiler (arduino.exe) while the board is connected 
  2. At the top you will find a option called tools.
  3. Open tools> board > UNO (your model if its mega select mega and so on).
  4. Again open tools> serial Port > select com(for me its com6) check yours from (device manager> PORTS(COM & LTP) >ARDUINO UNO.

  • NOW OPEN file>examples>1.basics>blink from the compiler (environment)
  • NOW PRESS upload option from the environment in few seconds u will find a orange light (blinking) at the pin 13.
NOW YOUR SYSTEM (BOARD AND COMPUTER) IS READY TO RUN THE ARDUINO.

reference: arduino.cc

introduction to arduino and its advantages:


Introduction :

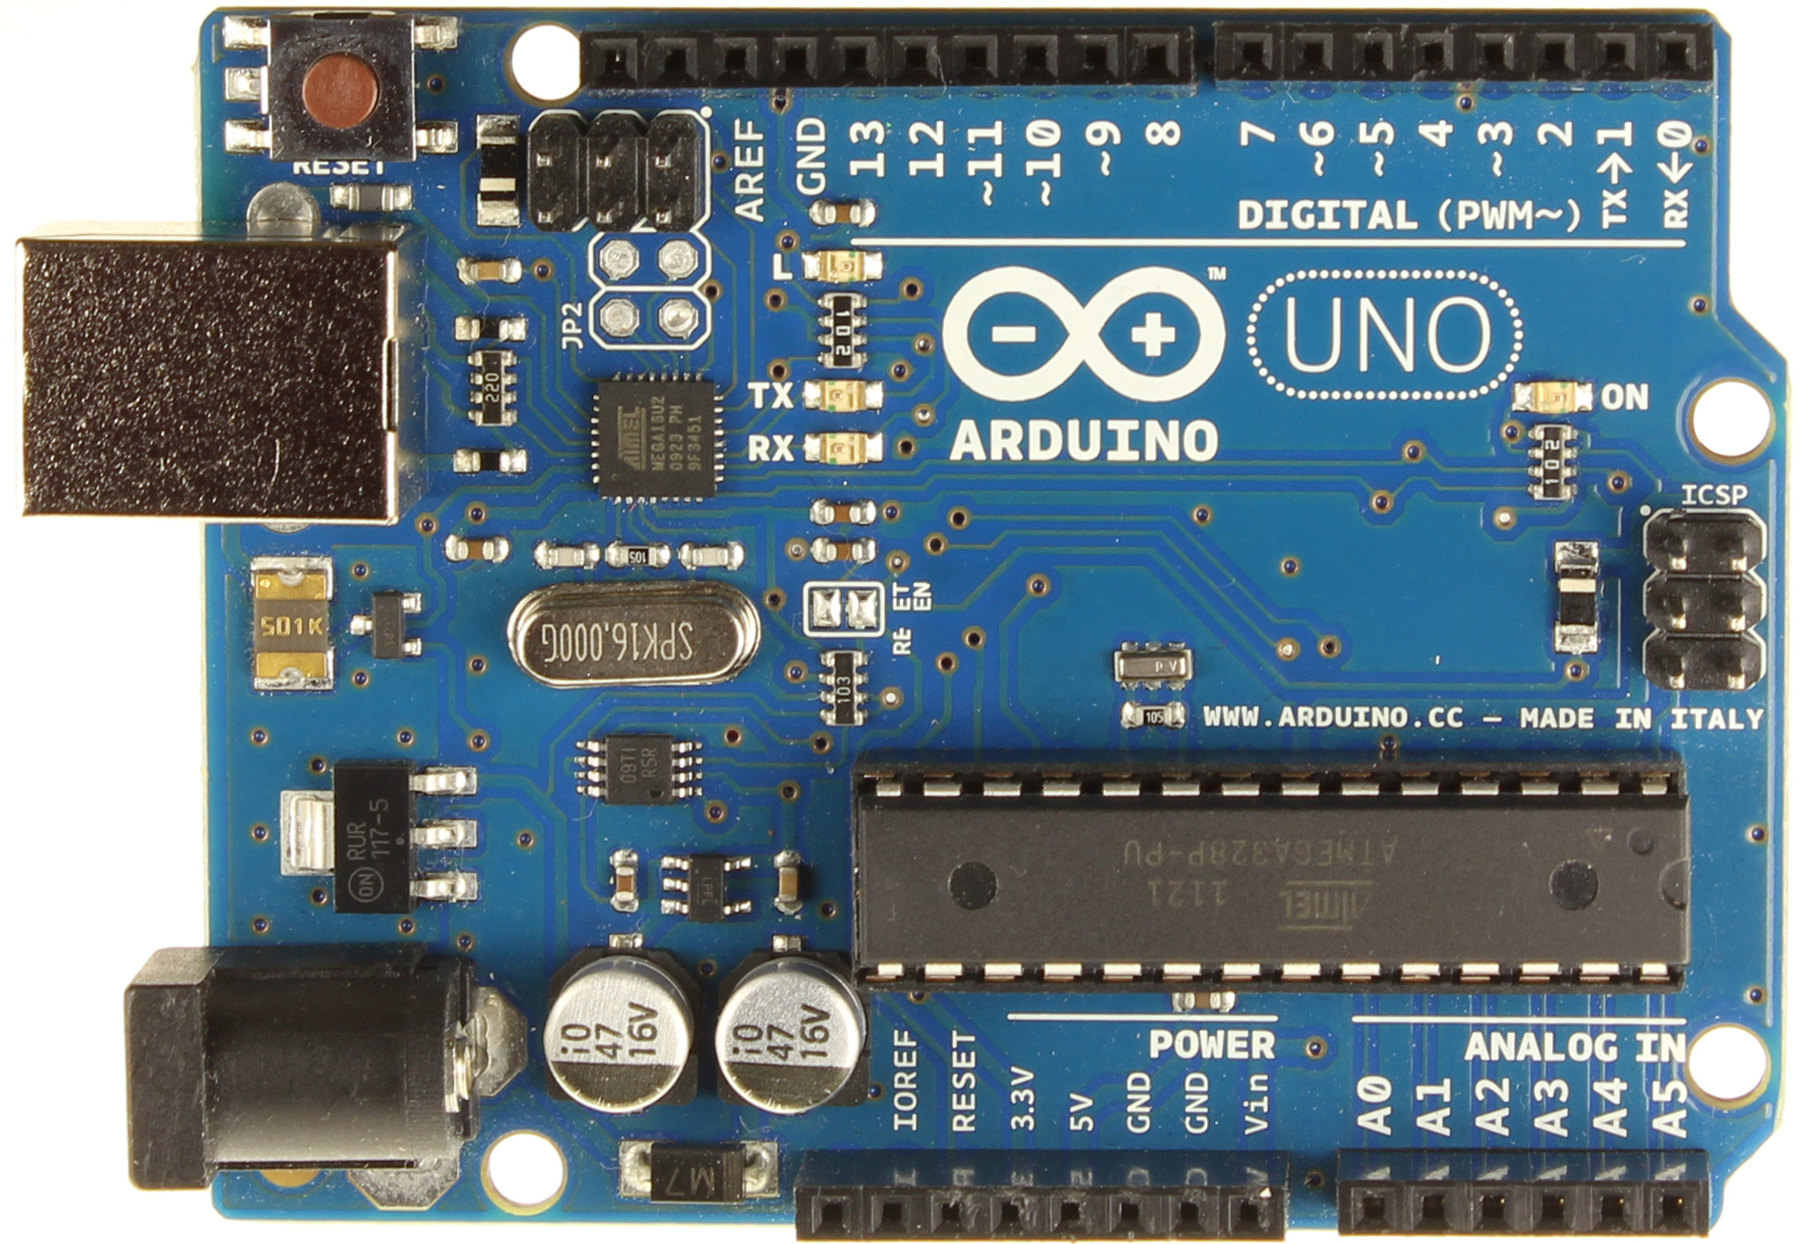
               Arduino is an open-source computer hardware and software company that designs and manufacture kits for building digital devices and interactive objects that can sense and control the physical world.

Open source means we can purchased reassembled , or do it yourself kits or make one our-self. The hardware design can be found on (arduino.cc) and the software source code can also be found there also we can use the same software without any modifications.

Basically Arduino comes with Atmel family processors(8bit -32bit). These are one type of development boards. They contain few sets of digital and analog I/O pins that can be interfaced to various extension boards and other circuits. Apart from I/O pins it has serial communication ports UTAR pins PWM pins and so on depending on different boards (ex:uno ,uno adk, mega. tiny and so on). For programming purpose Arduino provides integrated development environment(IDE) based on processing project (processing .org) basically a compiler and can be programmed using c and c++.

Advantages:
1. simple coding techniques
2. flexibility
3. low cost
4. large community and forum support
5. large number of connectivity (sensors)
6. user friendly and one can learn it in less that 10 days for sure
7. no need for soldering and burning code externally
8. plug and play(simply connect to computer and play with it)
9. cross platform
10. open source